Submitted by Daniel McFeeters on

It was May of 2015. With making 2 car payments, our budget was plenty tight, and we were looking for ways to trim down the bills. So, we looked over the biggest monthly bills in the budget. Car payments, house payment, insurances, taxes, etc. etc. Can't do much about that. Next was utilities—electric and telephone. The phone bill was over $100 each month. That was for basic local calling, no long distance, the only features we paid for were Caller-ID and basic Internet. The bill had just gone up when the phone company laid fiber to all the homes in the county. Fiber Internet was nice, but at only 15Mbps, it hardly seemed worth the expense, when we're both working all day, away from home, etc.
Plus, people never knew how to call us. We had no cell service at home—just maybe a hint of 1 bar of signal in one room of the house. So, our friends and family had to try calling cell phones, land line, etc, just to reach us. We couldn't call long distance from the home phone, so we used Skype to make long-distance calls—but then people had our Skype-out number on their caller-ID and that confused things even more.
So, here came the idea of installing a cell phone booster. If I walked up the hill a little ways, I could get good cell signal—4G data, in fact. I knew it was there, just a few feet out of reach from the house. So, I set about to remedy the situation.
I installed an app called Network Signal Info Pro (by KAIBITS Software). The app shows a lot of useful details about your current cell phone connection, including an ID number of the cell phone tower your phone is connected to, and the signal level. Even though the cell tower maps that came with the app weren't quite accurate, by driving around with my phone and checking from several locations, I was able to identify which tower had the strongest 4G signal near our house, and locate that tower precisely. This app and info came in handy later, once I bought a directional antenna for the cell booster, to help align the directional antenna. Turns out there are quite a few ridges between our house and the nearest tower, which is why the signal was flaky.
I did some research into different cell phone boosters. As with anything, there was quite a variety to choose from. I made sure to choose one that supports 4G LTE data on the AT&T network. Apparently Verizon and AT&T use different technologies and/or different frequency bands for their 4G LTE data, so zBoost offers models that support one or the other, but not both. Although I had a Verizon phone, I traded it out for an AT&T model, so both Kristina and I would be on the same network. (AT&T seems to work better in this area as well, so that was an easy choice.)
I ordered the zBoost ZB575-A Cell Phone Booster Kit. The kit comes with an outdoor Omni-directional antenna, 50 feet of coax cable, and the actual booster which sits inside, with an attached indoor antenna. According to the instructions, the outdoor antenna must be mounted with AT LEAST 15 feet of vertical separation above the indoor antenna—the more the better. I knew already that I would need as much elevation as I could get on the outdoor antenna.
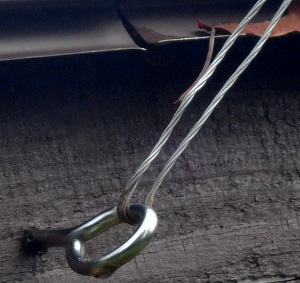
After I received the kit and started looking over the directions, I took a trip to Lowes. I had an idea for building an antenna mast, and it grew into a plan while I walked around the store. I put 4 pieces of 10’ metal conduit onto my cart, of various sizes between 0.75” and 1.5”. I determined that these could be “nested” into each other, something like a telescoping pole, and then fastened with self-drilling sheet-metal screws. I then found some stranded steel wire to use as a guy-wire, several packages of ferrell-and-stops to fasten loops in the guy-wire, some eye hooks, and a 1.5” U-bracket to fasten the pole to the roof.
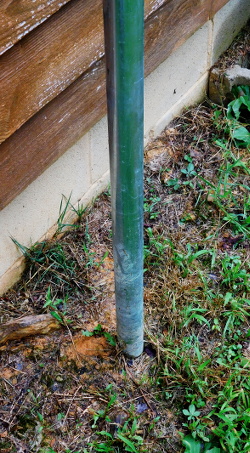
Arriving back home, I climbed to the roof and dropped a plumb line from the end of the roof to mark the base of the tower. I drove a 6’ metal fence post well into the ground at that spot. Then, it was time to assemble the tower.
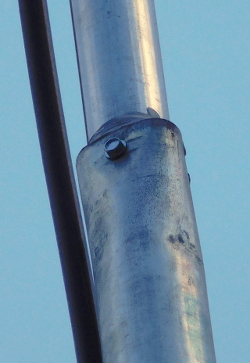
I started by cutting a 1” ring from the end of the 1” conduit, to use for fastening the guy wire. Then, I began fastening the poles together, overlapping each about 2” over top of the next smaller size. I used a sledge hammer to (carefully) “pinch” the larger tube into a triangular cross-section at the top, where it overlapped the smaller one, and also about 18-20” down toward the bottom of the inside tube, so the whole thing was quite snug even without the screws. Then I put screws at each of the 6 flat spots on each joint.
After the tower was assembled (on the ground, of course), I slipped the 1” ring over the top and down the 3/4” tube, almost to the top of the 1” tube. Then, I hooked 3 guy-wires through this ring, fastened them with the ferrel-and-stops, and finally screwed the ring in place to keep anything from moving around in the wind.
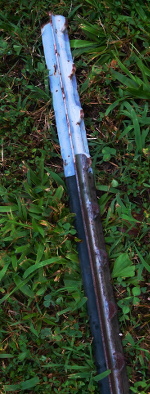
I mounted the outdoor antenna on the top of the pole, running the coax down the outside and taping it down with duct tape to prevent it from flying in the wind.
Once everything was assembled, I had Kristina and her dad help me raise the mast into position and slide it down over the fence post. The guy-wires were quite useful in helping to raise the pole! Once it was vertical, I quickly climbed to the roof and fastened the U-bracket over the pole at the roof line.
At this point, things were fairly stable, without any wind, so I had a few minutes to work on anchoring the guy wires. I was able to anchor two to the roof, and anchored the third to a stout tree several feet away.
At this point, it was just a matter of bringing the coax cable inside and connecting the booster.
At first, I was a bit disappointed with the performance of the booster. I could get good signal, but I had to stand in the same room with the booster, or it would drop out. I tried connecting another 50’ RG6 coax onto the 50’ that was supplied, to bring the booster into our office area, but the booster wouldn’t work on the 100’ cable.
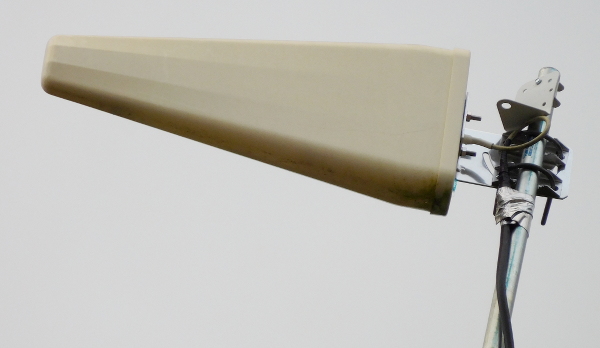
Eventually, I ordered the zBoost directional high-gain antenna, and a 100’ RG11 coax cable. I took down the mast, replaced the antenna and coax, and re-installed it as before. This was the charm! Now, I had full signal in my office, and acceptable signal through most of the house. I could easily get 10-15Mbps data through the 4G LTE network, so my only real bottleneck at this point was the monthly data cap.

Long-term, though, it has worked out well for us. The benefits in convenience and especially saved $$$ has out-weighed the inconvenience of having limited data. It encourages us to do less online at home and spend time with each other. We can call anywhere without jumping through hoops, and family and friends can reach us on the same number regardless if we’re at home or on the road. The system has long-since paid for itself in savings over our traditional phone service.
This summer (2016), we had a lightning storm that seems to have struck nearby the tower. We were home at the time and heard a huge explosion of thunder right near the house. While there wasn’t any visible damage, it must have discharged into the antenna, because it destroyed the cell phone booster and the power adapter that it was connected through. I bought a new booster and connected to the same antenna and coax and it works fine. This time, I installed a lightning surge protector in the coax between the antenna and the booster. Hopefully that will prevent future costly repairs like this one. Even still, we’ve saved money overall, and I plan to keep this system for the foreseeable future.
Total Cost: ~$600 (not counting replacing the booster in 2016 due to lightning)
Materials:
- Lowes (Total cost
- EMT Conduit 10' sections (antenna mast)
- 1.5”
- 1.25”
- 1”
- 0.75”
- 16-gauge stranded steel wire (100' roll) for guy-wire
- Ferrell-and-stops for steel guy-wire
- 1” eye hooks (to fasten steel guy-wire)
- 1.5” U-bracket (to fasten mast to roof)
- self-drilling sheet metal screws (to assemble antenna mast)
- metal fence post (base of antenna mast)
- 6' quad-shield RG6 coax patch (to connect surge protector)
- length of 12-gauge solid wire (for grounding wire)
- assorted ring terminals (for grounding wire)
- duct tape
- zBoost ZB575-A Cell Phone Booster Kit (~ $300)
- zBoost directional antenna (~$70)
- zBoost 100' RG11 Coaxial Cable (~ $80)
- AIR802 Coaxial Lightning Surge Protector (~$35)
- APC Back-UPS (BGE70) for battery backup / electrical surge protection (~$50)