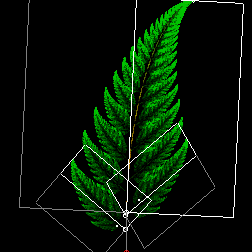
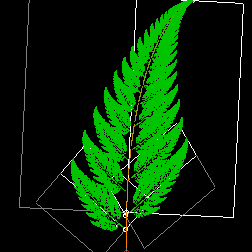
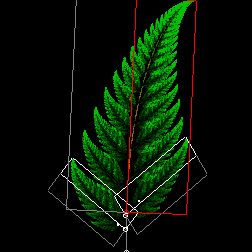
The main purpose of Visual IFS is to design IFS fractals. When you start the program, it starts in design mode with one transformation. The little circle in the corner of the transformation marks the base of the transformation. The corners adjacent to the base are the "left" and "right" corners of the transformation. These correspond to the upper left and the lower right corners of the fractal window, respectively. Actually, the only way to tell whether the corner of the transformation is the left or the right corner is to hold the mouse cursor over it and read the message in the status bar. You can edit the transformation by dragging the base and the left and right corners with the mouse. By rearranging the transformations in this way, the possibilities for different beautiful fractals are limited only by your imagination.
You can add more transformations by clicking the add button on the fractal navigation bar. It looks like this:

As you may have noticed, one transformation is red and the others are white. The red transformation is the selected transformation. Only the selected transformation can be moved or edited. You can select different transformations by clicking the base, or you can move through the transformation using the buttons on the fractal navigation bar. If you have too many transformations, click the delete button to get rid of one.
Notice the little circle that seems to float around the transformation. This is called the IFS attracter. This marks the "edge" or "center" of the image in this transformation. This is where the fractal comes together. As you move each transformation, this attracter moves around to show you where the edge of the fractal will be. It's easiest to understand just by trying it out.
After you have the transformations in the right place, click the Start button ![]() on the toolbar to start the fractal generator. If one of your transformations is very large or is not filling in as you expected, you will need to adjust the "chance" variable for each of the transformations. Select the transformation and edit the number in the box just above the fractal navigation bar. The "chance" variable determines how much a transformation fills in. Since you can't set it to a number greater than one, you will probably need to set the chance for the other transformations to a lower number like 0.05 or less. Do whatever you need to do to get the fractal the way you want it.
on the toolbar to start the fractal generator. If one of your transformations is very large or is not filling in as you expected, you will need to adjust the "chance" variable for each of the transformations. Select the transformation and edit the number in the box just above the fractal navigation bar. The "chance" variable determines how much a transformation fills in. Since you can't set it to a number greater than one, you will probably need to set the chance for the other transformations to a lower number like 0.05 or less. Do whatever you need to do to get the fractal the way you want it.
So far, the fractal has been black and white. Visual IFS has a unique system for coloring each transformation a different color, and at the same time blending the colors and shading the fractal to give it an almost photographic texture. Select the transformation you want to color and click the button in the fractal coloring window that has the color you want. Or, you can specify a custom color by clicking the custom color button. Check (ü) the color blending and/or the color shading boxes to blend and shade the colors in the fractal. Or leave them empty to have a solid color.
Note: You can change the background color for your fractal by right-clicking the button in the color pallet or the custom color button. This is especially important if you want to print your fractal.
Probably the best way to learn to design IFS fractals is just to start trying it out. Here are a few tips to help you:
![]() You have to have more than one transformation to make a fractal. One transformation will only make one dot.
You have to have more than one transformation to make a fractal. One transformation will only make one dot.
![]() You can set a picture as the background for the window and make a fractal based on the picture.
You can set a picture as the background for the window and make a fractal based on the picture.
![]() You can turn on the fractal generator while you are designing the fractal. That way you can see what you're doing while you're doing it.
You can turn on the fractal generator while you are designing the fractal. That way you can see what you're doing while you're doing it.
![]() Adjust the "chance" variable as necessary to get the right results.
Adjust the "chance" variable as necessary to get the right results.
![]() Watch the little circle marking the attracter while you're moving the transformation. On the large transformations, a tiny movement can change the fractal a great deal!
Watch the little circle marking the attracter while you're moving the transformation. On the large transformations, a tiny movement can change the fractal a great deal!
![]() Try to make fractals that fill most of the window. It's easier to see how big the image in the transformation will be if you fill most of the window. If you have a tall, skinny picture or a wide, flat picture, resist the temptation to make the transformations tall and skinny. Widen them out and let them overlap a little bit. Look at the following example. The pictures on the right show the image we're trying to get and the outlines of the transformations. The pictures on the left show the resulting fractal.
Try to make fractals that fill most of the window. It's easier to see how big the image in the transformation will be if you fill most of the window. If you have a tall, skinny picture or a wide, flat picture, resist the temptation to make the transformations tall and skinny. Widen them out and let them overlap a little bit. Look at the following example. The pictures on the right show the image we're trying to get and the outlines of the transformations. The pictures on the left show the resulting fractal.
This
Yields this


This
Yields this


P.S. Don't forget to save your fractal!